
Space and Time Modal
The Space/Time modal is where your SpaceDraft journey begins. This is where you set your background (Space) and timeline (Time) – the foundations upon which your SpaceDraft is built.
Once you have created your project in the My Projects page, you will be prompted to set the scene by clicking the start button. This opens the Space / Time modal, which can also be found by clicking the cog in the top right hand corner of the screen.
You can open the Space and Time settings at any point during your build to make adjustments.
Space settings
Here is where you set your background. You can choose from a few options:
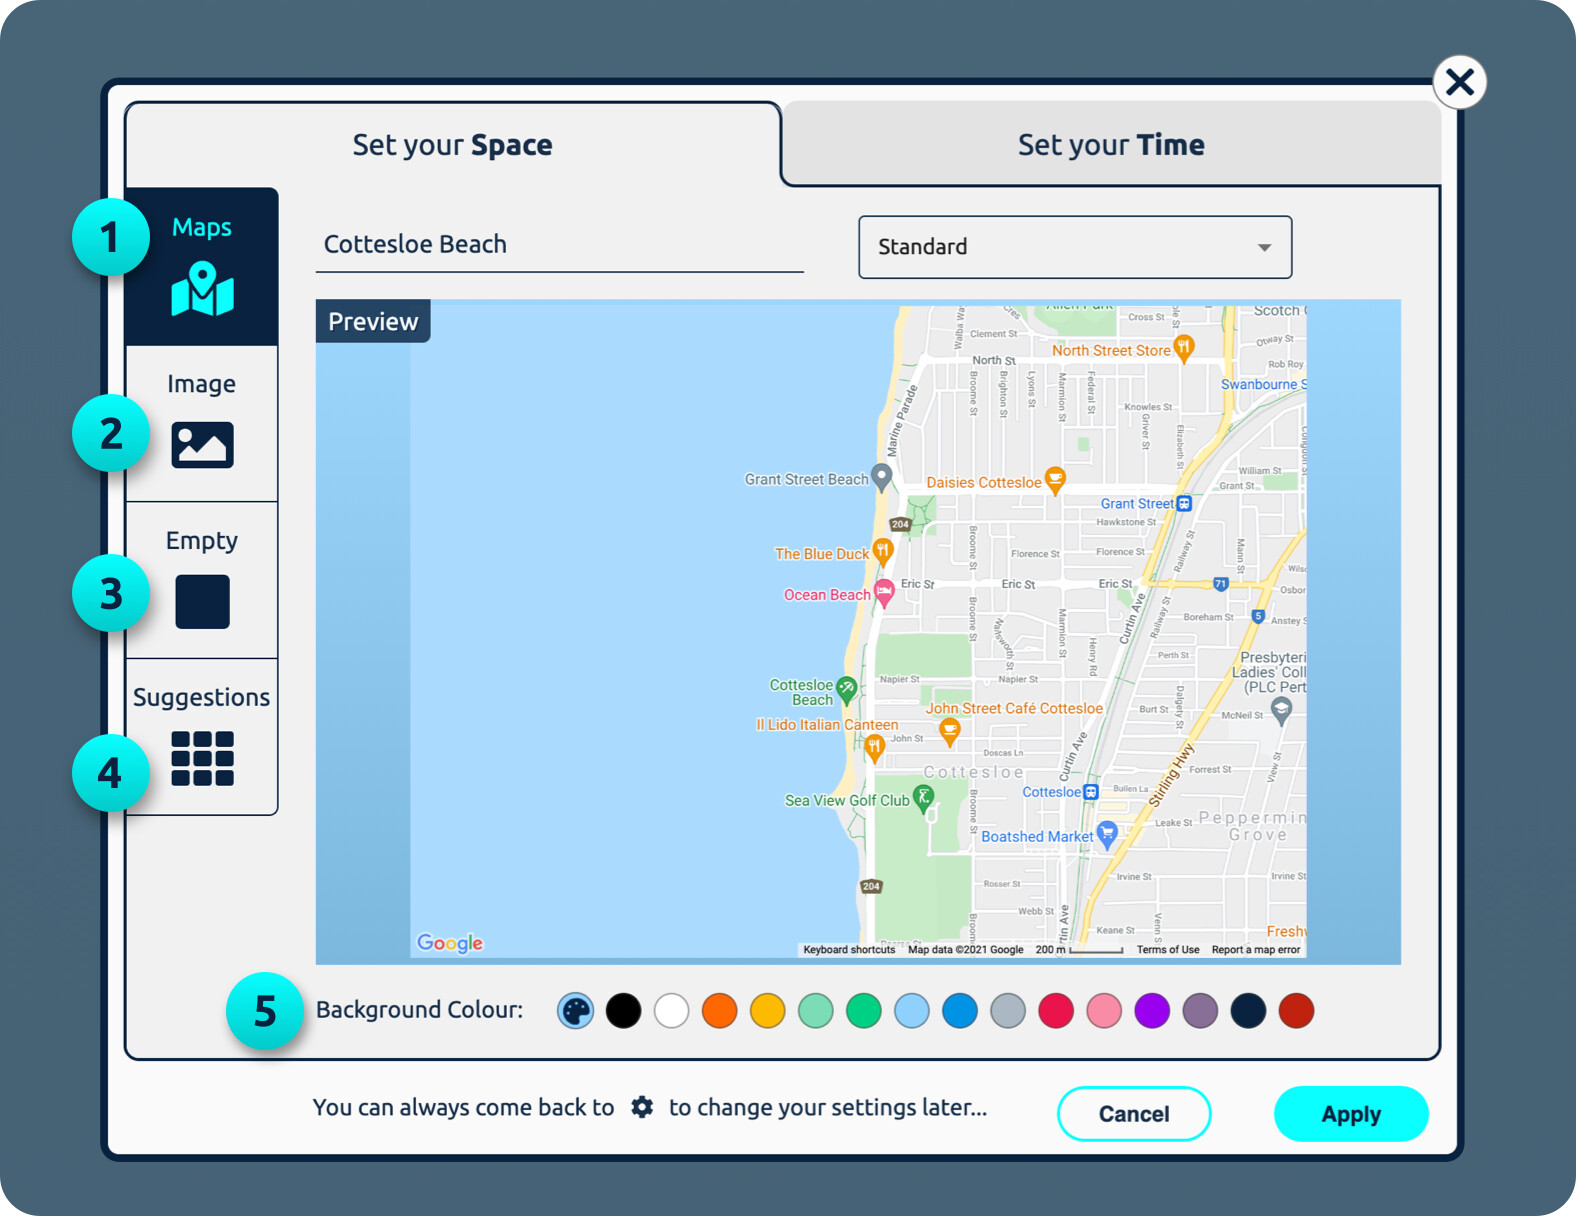
1. Maps
Enter an address and choose a map type. To zoom – use two fingers on the trackpad or CONTROL + mouse scroll.
Use Maps if you are building a SpaceDraft based on a specific location. For example, directions on how to get somewhere.
 For touch devices, spread two fingers apart on the map to zoom in. Pinch to zoom out.
2. Image
Upload or drag and drop any image to use as your background.
You can upload any image whether it’s a screenshot, something you have created, or downloaded from the internet. It can be a floor plan or graphic of any physical or virtual space.
3. Empty
Selecting Empty gives you a blank canvas. Use this option if you want to mark up your background within SpaceDraft using the draw tools.
4. Suggestions
Use suggestions to browse templates.
5. Background colour
Set your background colour by using the pallet at the bottom of the window. You can choose one of the default colours or click the pallet to input a HEX value.
Time settings
The time settings can be found by clicking the ‘Set your Time’ tab at the top of the modal. Choose a time format that suits your project.
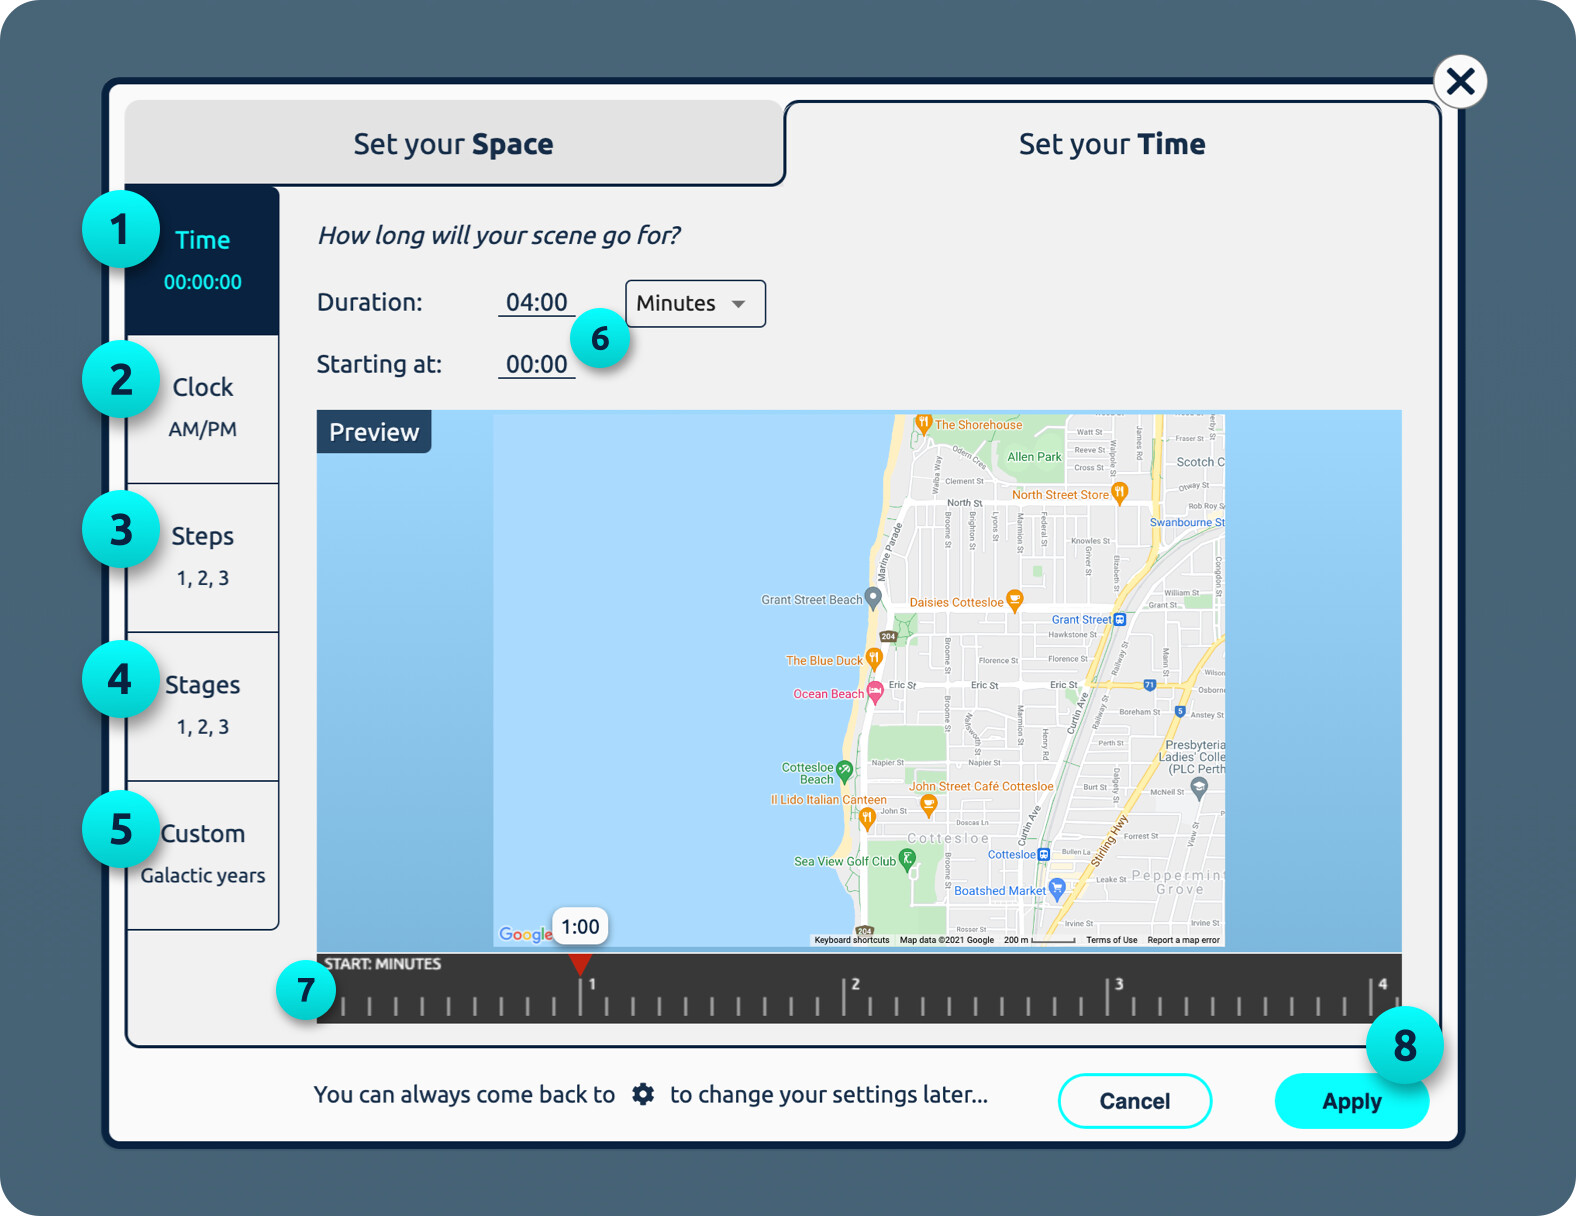
1. Time
Set your scene in minutes, hours or seconds.
2. Clock
Schedule the plan in 12 or 24 hour time.
3. Steps
Kick off your SpaceDraft by using step intervals.
4. Stages
Start your SpaceDraft at a certain stage.
5. Custom
Define your SpaceDraft in custom units of your choice such as Galactic Years, Yards or Unicorn Hops.
6. Duration and Start Time
Set the start time – when you want your scene to begin, and duration or end time – how long you want the scene to go for.
7. Timeline Preview
Use the timeline preview under the background preview to see how your time measurement will display.
8. Apply
Hit the apply button to set your Space and Time options, or press cancel to revert back to the previous settings.